Lab Report 1 - Week 2
Remote Server Connection Through SSH
Hello incoming 15L students (and myself)! Here’s my journey on the very first lab of this course.
Because this is the first lab, there’s going to be a ton of things to set-up before we do some magic.
Preinstallation
Before everything happens, let’s start off with getting a text editor to code. To be honest, it doesn’t really matter which type of text editor you have (Elipse, VSCode, Notepad++, etc.), but for this course, we will be using Visual Studio Code (aka VSCode…the most common coding text editor).
- Head to the Visual Code Studio website & download the one for your operating system.
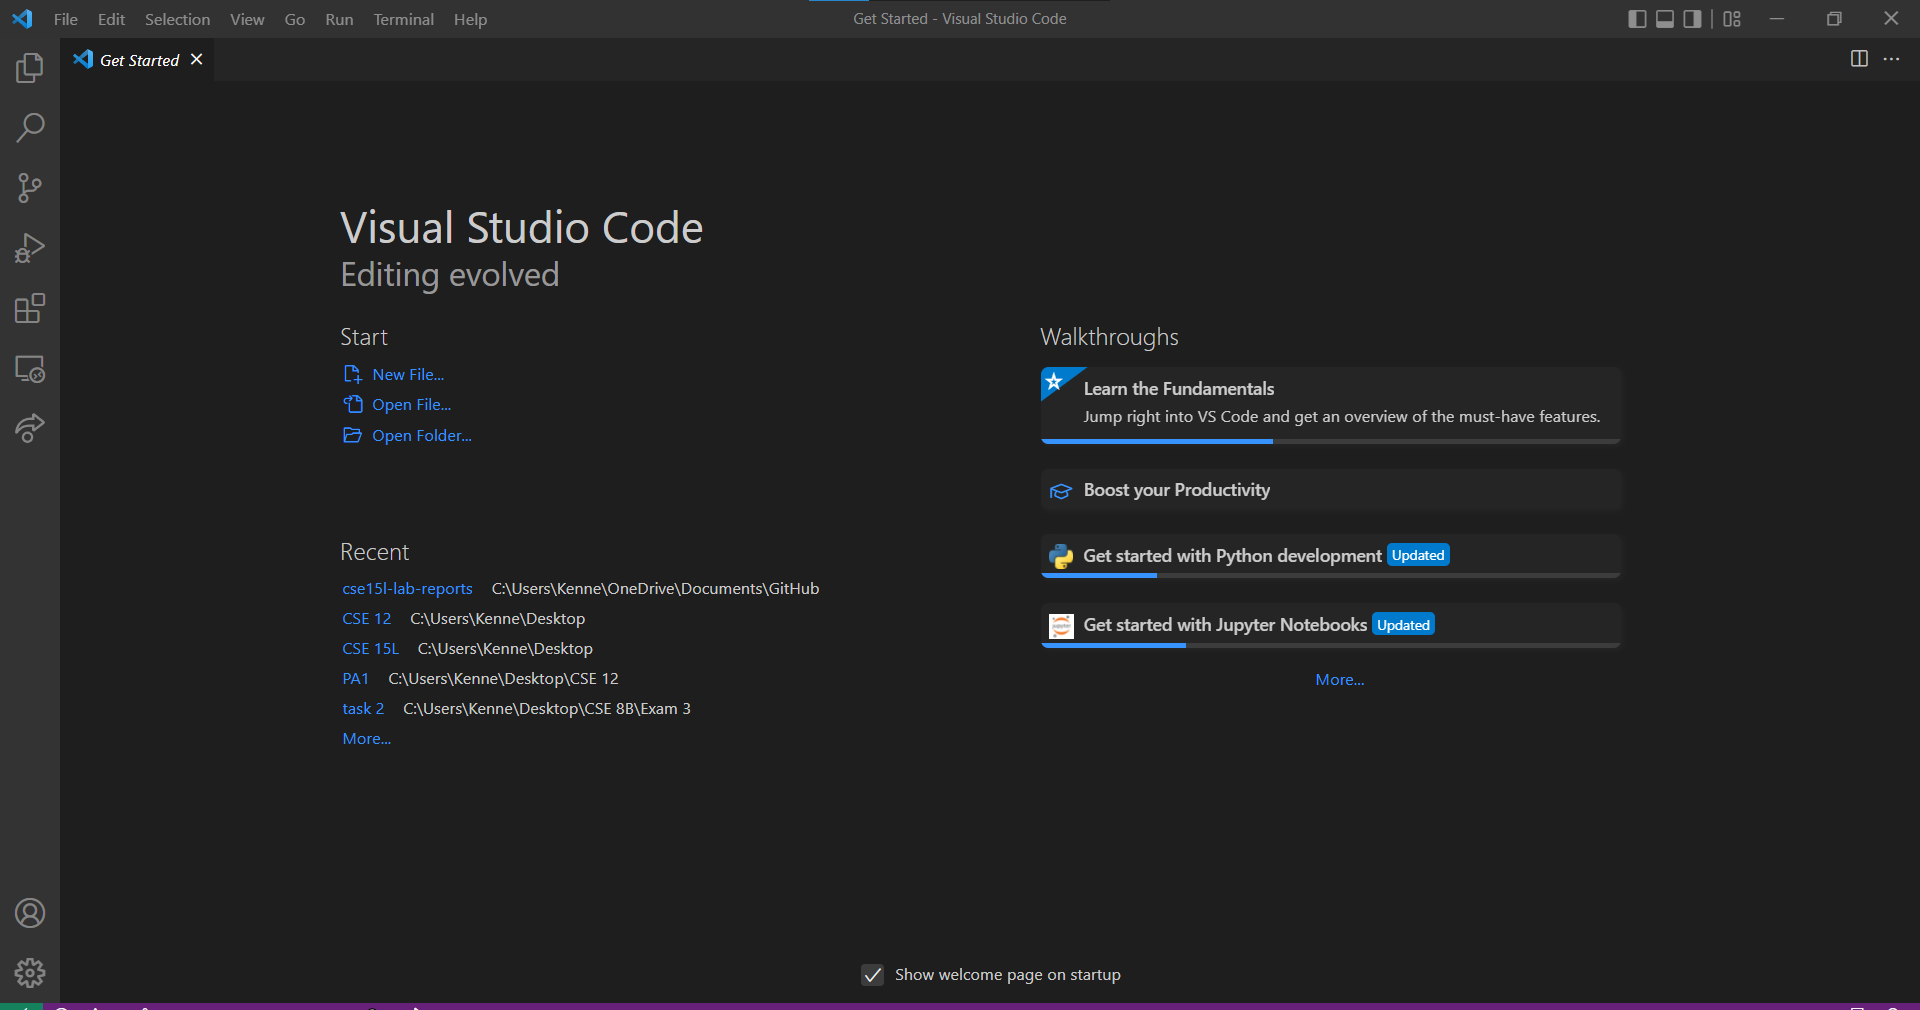
- When you open VSCode, you should sort of see this image below (and that means you’re good to go!)
Connecting to a Remote Server
This is where it gets real cool but may be quite confusing. We’re going to be remotely connecting to a server and accessing it as a different device (but only through a terminal). We’re going to be using SSH (Secure Shell Protocol). Think of it like accessing & remotely connecting to a server like cloud gaming.
Part 1 - Preinstallation
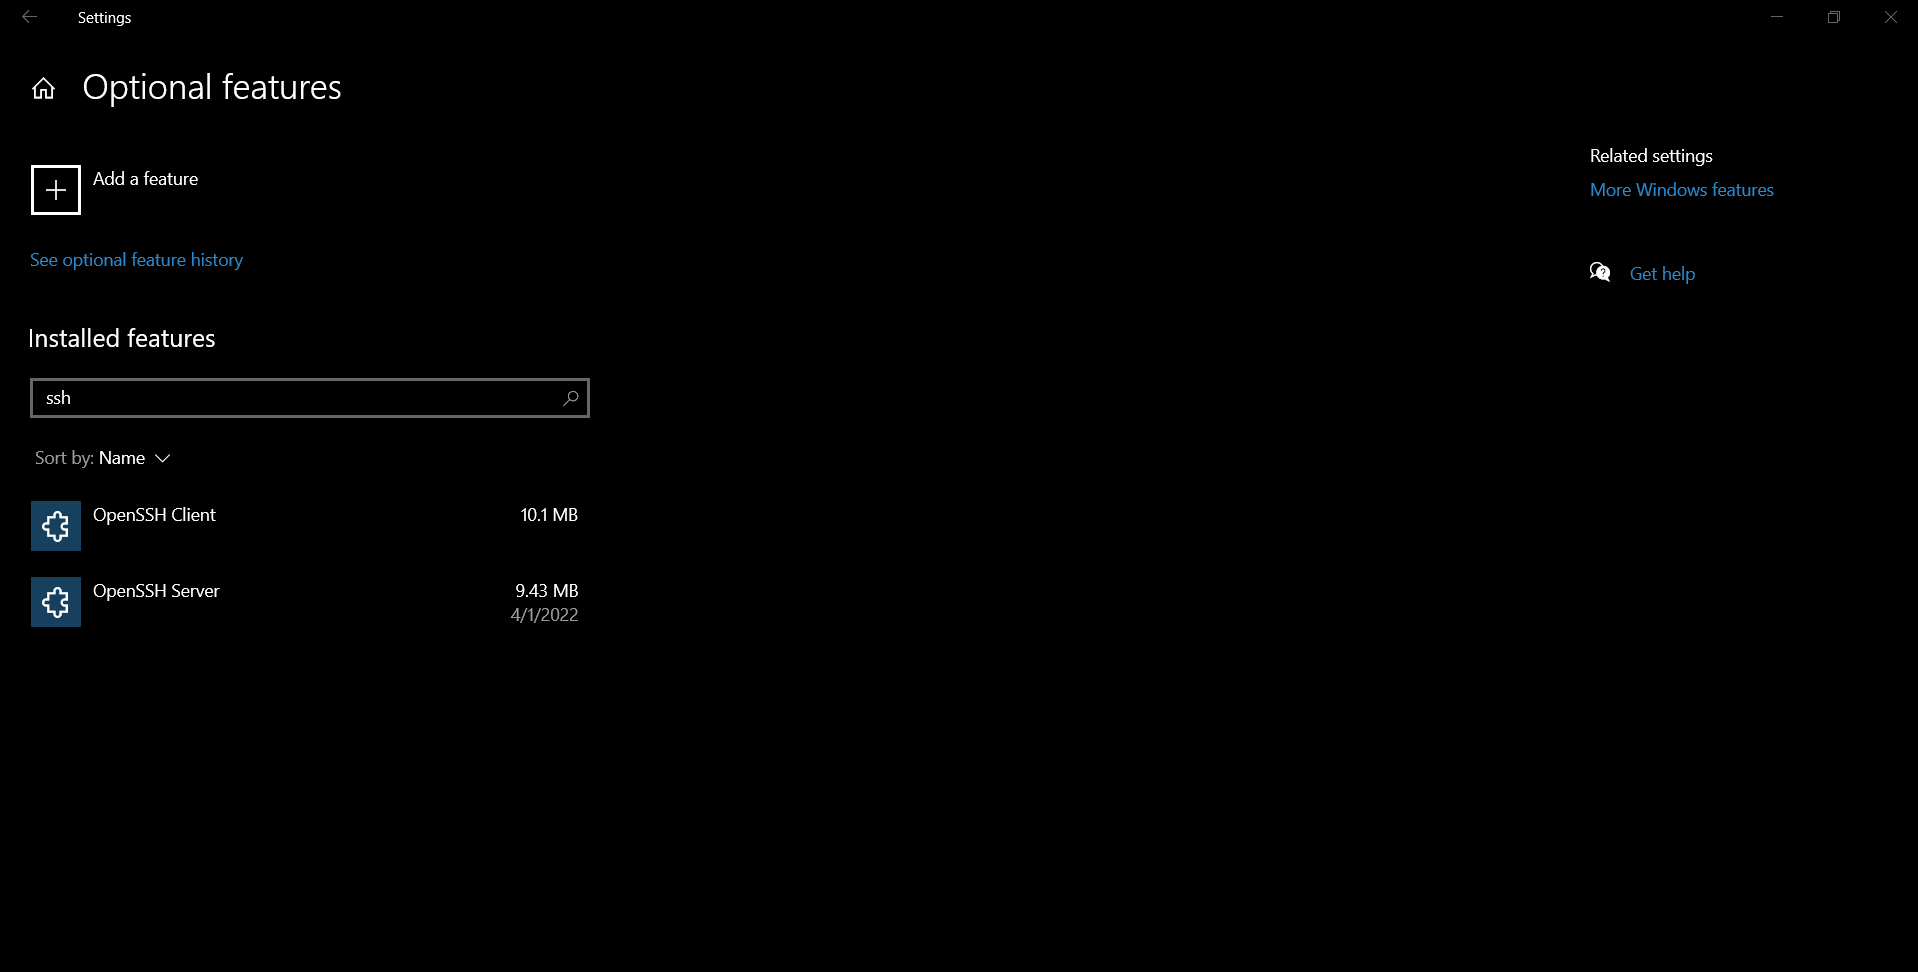
- Before we connect remotely to a server, we need to make sure we have OpenSSH installed on our computer. Make sure you have the two installed:
- OpenSSH Client
- OpenSSH Server
Part 2 - Finding your course-specific account
- Once you have installed OpenSSH, we first need to know what your course-specific account is for 15L.
- Go to the link above and lookup your account with your UCSD username (without the @ucsd.edu) and student ID.
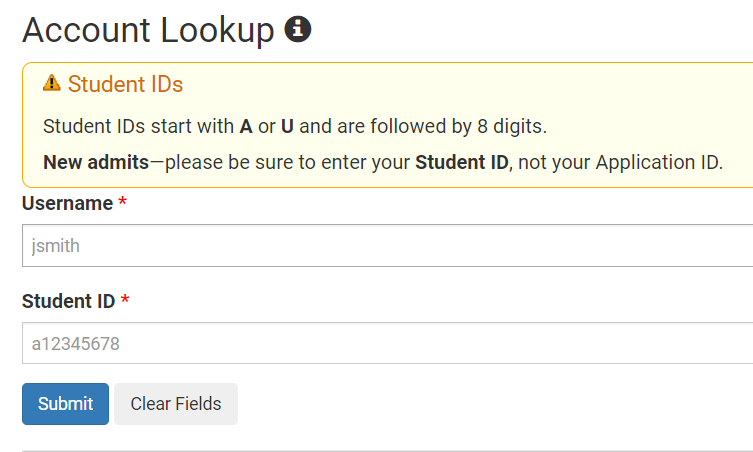
- Once you’re in, under Additional Accounts, you should see a button with a username of cs15lsp22###
- cs15l is the course
- sp22 is the current quarter
- ### is your unique account
- Just in case, you should change the password for that account (as for the first time, the password is randomly generated without you knowing) for you to have a more simpler password to remember.
- Once you’ve changed your password, wait for about 10 - 45 minutes for the system to change the password, and you’re good to go!
- Go to the link above and lookup your account with your UCSD username (without the @ucsd.edu) and student ID.
- Write down your account username and password somewhere for convenience!
Part 3 - Connecting to the Remote Server Computer
- We’re going to be connecting to one of UCSD’s server computers through VSCode (ieng6).
- Open VSCode and open a new terminal (there’s a tab up top called Terminal, press New Terminal)
- You should now see a terminal pop-up of your operating system’s main command-line (in my case, it’s windows powershell)

- Within the terminal, type:
ssh username@ieng6.ucsd.edu - (Optional) If in the case this is your first-time (which it probably is), you will probably get a message that denotes:
Authenticity of host "ieng6.ucsd.edu (IP)" can't be established. RSA key fingerprint is: ~~~ Are you sure you want to continue connecting?- When it prompts before connecting, type
yesand enter.- Afterwards, it will prompt you to enter your password, so enter the password you took from your course-specific account (your password won’t display on the terminal, but it’s there).
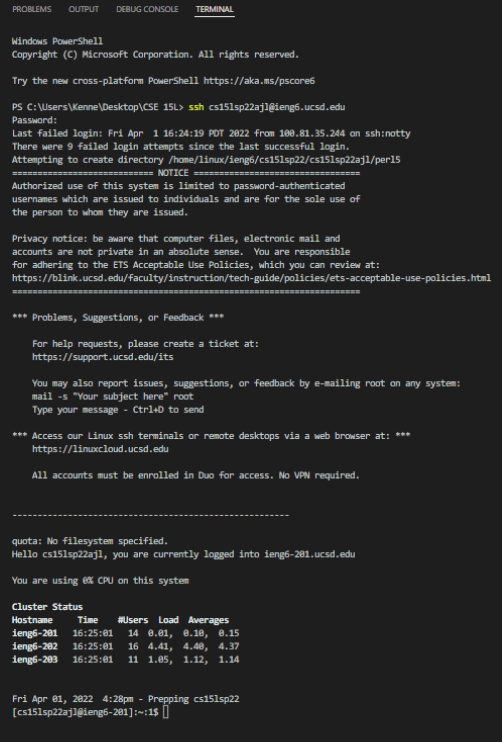
- Once you’ve entered your password, you should be remotely connected to the ieng6 server!
- When it prompts before connecting, type
- Open VSCode and open a new terminal (there’s a tab up top called Terminal, press New Terminal)
Run Commands on the Remote Computer
-
Now that we’re able to access the server computer remotely through our computer (and specific account), let’s try some commands that will be useful (both on your computer and the server computer).
-
Try to run commands in the terminal like
cd, ls, pwd, mkdir, cp. Think about what it does. While it may seem it did nothing or did something, here are a few commands and what they mean:-
cd- Changes directory (or path). Think of it like where your files are located.
- ex. /home/linux/ieng6/cs15lsp22/cs15lsp22ajl
- ex. /This_PC/Desktop/CSE_15L/randomfolder
cd <directory>- Goes into a specific directory
cd ~- Goes back to home/root directory of your account
cd ..- Goes back a directory
- Changes directory (or path). Think of it like where your files are located.
-
ls- List files at that specific directory. Think of it as listing all the files of a programming assignment for a CS class.
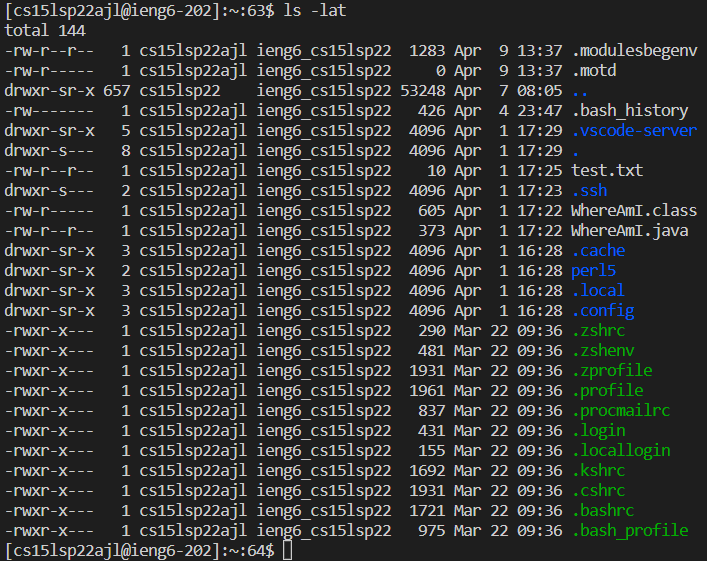
ls -lat- Combination of:
ls -l- List files within a specific format
ls -a- List all files (including hidden files)
ls -t- List files by recent date modified
- Combination of:
-
cp- Copy files & directories
-
cat- Print content out of a file. Think of it like reading from a text file without opening the text file.
-
exit- Exit remotely from the server computer back to your own computer.
-
Moving Files over SSH with scp
-
So, we know a few commands to run through the terminal to go back & forth, copy, and read files. Now let’s go to the next level and transfer files from your computer to the server computer.
-
We are going to be using the
scpcommand to make this magic work. SCP stands for Secure Copy Protocol, and basically it’s another way to copy files (but between networks). We always run this command through the client (your computer).
Part 1 - Creating a file to transfer
- On your computer (not accessing the server computer), create a file called WhereAmI.java & then put this piece of code into the file:
class WhereAmI { public static void main(String[] args) { System.out.println(System.getProperty("os.name")); System.out.println(System.getProperty("user.name")); System.out.println(System.getProperty("user.home")); System.out.println(System.getProperty("user.dir")); } } - Save the file, then in your terminal, run the
javac&javacommands for that file (you can skip this if you don’t have java installed):javac WhereAmI.javajava WhereAmI- Keep in mind what this file does! It should print your system’s properties or info about it.
Part 2 - Transfering the file
- Now that we have the file on your computer, let’s use the
scpcommand to transfer the file to the server computer:scp WhereAmI.java username@ieng6.ucsd.edu:~/- It should prompt you to enter your password just like logging in with
ssh, so enter your password.
- It should prompt you to enter your password just like logging in with
- Once it has done its magic, log back into the ieng6 server computer using
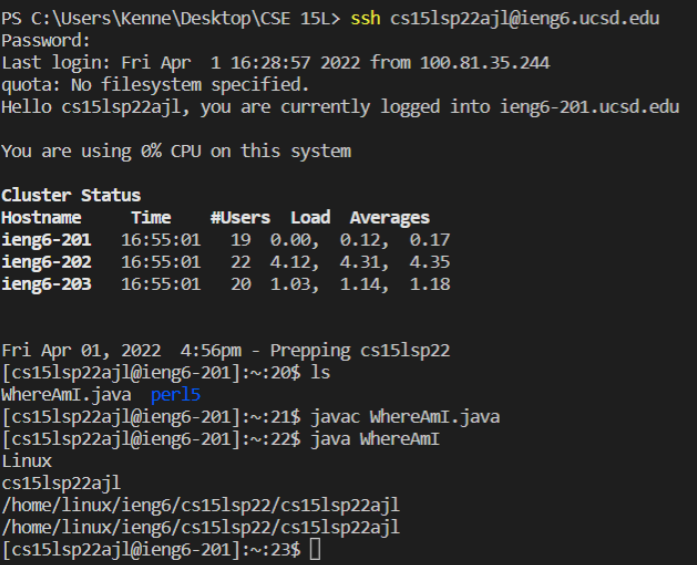
sshlike the usual, and use thelscommand. You should see that the WhereAmI.java file is right in your home directory! - You’re able to use the
javac&javacommands to run the file, as the server has java installed! Try running those two commands to see what you get.- You probably should get the properties of the server computer that you are accessing!
SSH Keys
- Remotely connecting to the ieng6 server usually takes typing the
sshcommand and entering your password. Going back and forth may become tedious, so let’s make it more convenient & save times to log into the server! - We are going to be generating SSH keys to make that more convenient, where it makes a pair of a public & private key as a way to automatically access the server computer without entering your password.
Part 1 - Generating the SSH Key Pair
- On your client (your computer), run the
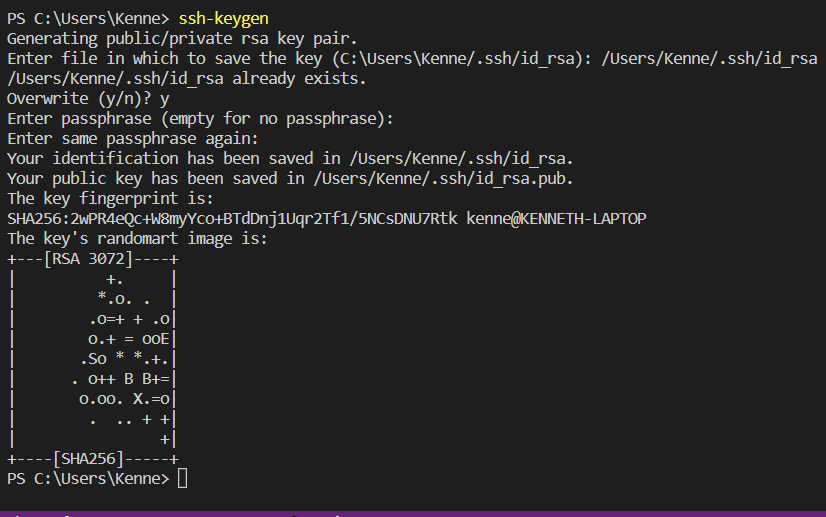
ssh-keygencommand in your terminal.- It should prompt afterwards (after generating):
  Generating public/private rsa key pair.
  Enter file in which to save the key (/Users/<username>/.ssh/id_rsa):
- It should prompt afterwards (after generating):
- Once it prompts to enter a file, enter:
(/Users/<username>/.ssh/id_rsa):
/Users/<username>/.ssh/id_rsa - Once it prompts for a passphrase, don’t enter one. Just hit enter.
- It’ll ask to enter the same passphrase again. Hit enter again.
-
You’ll see that it has saved the identification and public key to a specific directory. Also you should see the key fingerprint & the key’s randomart image (pretty neat!).
Part 2 - Copying Public Key to Your Account on the Server
- Now that we have two keys (public and private), we’ll need copy the public key to the
.sshdirectory of your account in the server.- Log back into the server using
sshas usual - Once you’re in the server, we’ll be using the
mkdircommand to make a new & empty directory to make a .ssh directory in the server:mkdir .ssh Exitout of the server back onto your client, then use thisscpcommand:scp /Users/<username>/.ssh/id_rsa.pub <username>@ieng6.ucsd.edu:~/.ssh/authorized_keys- We’re copying the key over the server, so the server recognizes that our client has matching keys (so it automatically knows to log in)
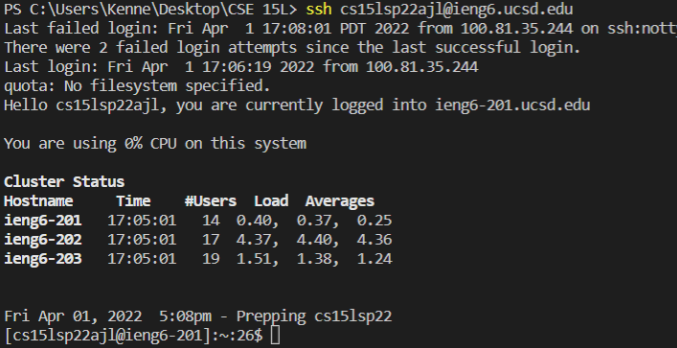
- You are done! Any command such as
sshorscpthat requires you to enter your password will not require you to enter your password (as it will do it automatically).
- Log back into the server using
Optimizing Remote Running
- Once you’ve reached this point, it’s all about optimizing. Making things more convenient, ease of access, or just saving time by a ton. It isn’t necessary, but it’ll make things a little more pleasant.
- Here are a few things that I found are pretty cool to make it easier between the client and the server computer:
- Writing commands in quotes:
- At the end of
sshcommands, you can run specific commands directly on the remote server then exit.ssh <username>@ieng6.ucsd.edu "ls"

- At the end of
- Using semicolons to run multiple commands in the same line:
cp WhereAmI.java OtherMain.java; javac OtherMain.java; java OtherMain - Using the up-arrow (on your keyboard) to see the command you previously ran
- The most coolest of all…getting extensions through VSCode to access the server computer remotely.
- There’s an extension in VSCode called Remote - SSH, and with a bit of manual labor to figure things out, you’re able to access the server computer files that you want to edit.
- ex. Editting WhereAmI.java in the server computer instead of your client computer…and then using the
scpcommand.
- ex. Editting WhereAmI.java in the server computer instead of your client computer…and then using the
- There’s an extension in VSCode called Remote - SSH, and with a bit of manual labor to figure things out, you’re able to access the server computer files that you want to edit.
- Writing commands in quotes:
